



Toytales Insights & Guides
Explore the latest trends, manufacturing guides, and plush toy industry insights.
How to Develop a Custom Soft Toy Prototype?
Table of Contents
- Define the Toy Brief, User Age, Dimensions, and Prototype Budget
- Translate Sketches into Patterns, Seam Allowances, and Material Specifications
- Select Fabrics, Fillings, and Trims for Safety and Manufacturability
- Build and Evaluate a Sample Against ASTM F963 and EN 71 Requirements
- Refine the Prototype and Verify CPSIA Limits: 100 ppm Lead, 0.1% Phthalates
- FAQS
- Conclusion
- Related Posts
A soft toy may look simple: two fabric panels, stitched eyes, and a handful of stuffing. Yet turning that sketch into a dependable product takes careful decisions about shape, materials, construction, and testing. Custom Soft Toy Prototype Development gives teams a physical sample to inspect before committing to larger production. A prototype can reveal problems a drawing cannot, such as a floppy ear, a seam that twists, or stuffing that shifts after squeezing.
Market context makes that work worth doing. Circana’s 2024 global toy industry review reported a 7% increase in toy sales value, with growth across several regions. That figure covers toys broadly, not plush products alone, so it should not be treated as a soft-toy forecast. Still, it signals a competitive category where clear product appeal matters. A distinctive character helps, but comfort, finish, and consistency matter too.
Good development starts with a clear brief: target age, approximate size, fabric feel, colors, and intended use. Then a maker can translate the concept into a pattern, choose suitable textiles and filling, and build a first sample. Small details count. An embroidered smile may feel warmer than a hard plastic feature, while a denser fabric can change how the toy drapes. Not every first sample works. That is useful. Careful review, documented revisions, and appropriate safety testing help reduce costly surprises before production begins. This guide explains the key stages and the practical questions to ask along the way.
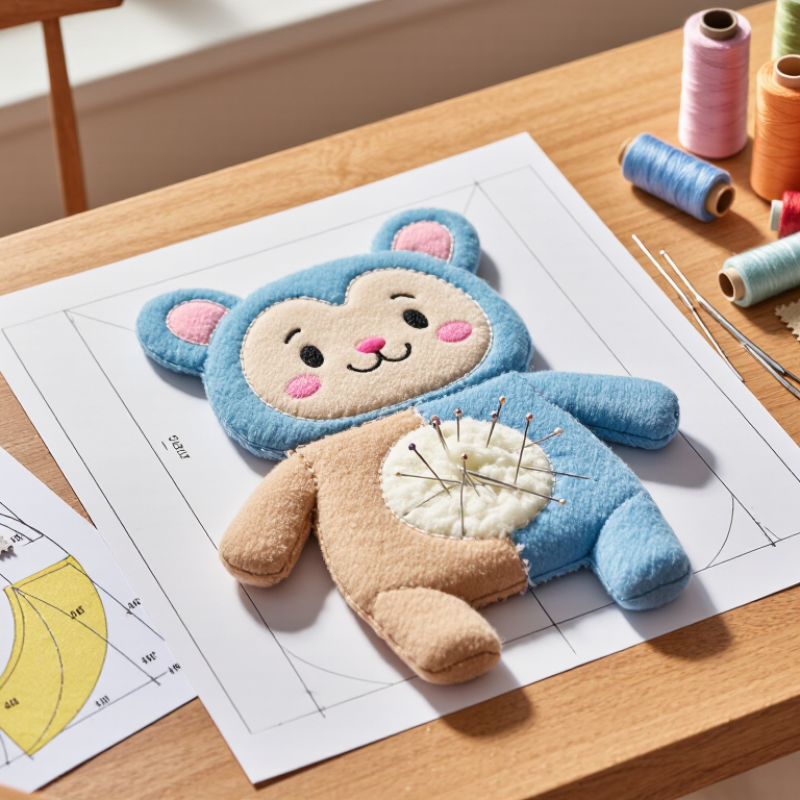
Define the Toy Brief, User Age, Dimensions, and Prototype Budget
How to Develop a Custom Soft Toy Prototype?
Define the Toy Brief, User Age, Dimensions, and Prototype Budget
A useful brief turns a cute sketch into a sample a maker can actually build. Describe the character, fabric feel, colors, stitching, and intended play. Add a front-and-side drawing, even if it looks rough. State the target age and explain whether the toy is for cuddling, display, or active play. Age affects details such as eye construction, seams, and small decorative parts. The U.S. Consumer Product Safety Commission warns that small parts can pose choking hazards for children under three. Treat age as a design requirement, not a label added later.
Set dimensions in centimeters and list key measurements, such as seated height, ear length, and body width. A 25-centimeter toy may need different pattern proportions from a 40-centimeter version. Then set a prototype budget that covers pattern work, materials, sample making, and at least one revision. Circana reported that toy sales across 12 major markets declined 7% in 2023. That is a reminder to test costs early; a beautiful sample can still exceed the planned price.
Tips: Ask the maker to quote the first sample and one revision separately. Send a fabric reference, but accept that the exact texture may not be available. Keep a small contingency for pattern changes. I once thought a simpler face would save time; it did not, because embroidery placement needed another test. A modest mistake, but useful.
Translate Sketches into Patterns, Seam Allowances, and Material Specifications
A soft-toy sketch shows the idea, but a pattern makes it buildable. Draw separate pieces for the front, back, side gusset, ears, and limbs. Mark matching points, such as the top of each ear and the center of the face, so curved edges meet in the right places. Add seam allowances outside the finished outline, not inside it. A 6 mm allowance may suit small pieces, while larger seams may need more room for turning and stitching. Check the scale by sewing a quick paper or fabric mock-up. Small changes matter.
Material specifications should describe more than color. Record fabric type, pile direction, stretch, and approximate weight. A short-pile fabric can show facial details clearly, while a stretchy knit may distort a narrow muzzle. Note the filling type and how firmly each section should be stuffed; otherwise, two samples can feel surprisingly different. Test a small seam first. It can reveal skipped stitches, bulky corners, or fabric that frays sooner than expected.
Keep a revision sheet beside the pattern. List measurements, seam allowance, material samples, and changes made after each test. If the head looks too flat, adjust its gusset depth and sew another sample before changing the whole pattern. Prototypes rarely match the first drawing exactly. I would still question a measurement that looks precise on paper but produces an awkward shape in fabric. Folded seams and stuffing can shift the result.
Select Fabrics, Fillings, and Trims for Safety and Manufacturability
How to Develop a Custom Soft Toy Prototype?
Fabric selection should begin with contact, not appearance. Choose tightly woven polyester, cotton, or certified recycled fibers with stable colorfastness. Loose fibers can shed into a child’s mouth. Soft textures also hide weak seams, so inspect the reverse side carefully.
Filling affects both safety and production speed. Use clean, evenly sized polyester fiberfill with documented composition and batch traceability. Avoid foam pieces that can escape through small openings. The U.S. Consumer Product Safety Commission reported an estimated 209,500 toy-related emergency-department injuries in 2022. That figure makes seam strength more than a design detail. Reinforce stress points near ears, limbs, and embroidered features. Keep seams boring. They should survive repeated pulling, twisting, and washing.
Trims need a manufacturable attachment method. Embroidered eyes are usually easier to control than glued decorations. If you use ribbons, labels, or textured patches, check their edges and attachment strength. The European Chemicals Agency’s enforcement project examined 2,407 toys and found roughly one in five failed at least one requirement. Small parts and restricted chemicals remain recurring concerns. Test it again. My first prototype looked excellent but used a trim that curled after washing. I replaced it with a flatter woven tape, though the result felt slightly less decorative. That compromise improved consistency during cutting and sewing. Before approval, request material certificates, conduct wash tests, and inspect production samples rather than trusting a single prototype.
How to Develop a Custom Soft Toy Prototype? - Select Fabrics, Fillings, and Trims for Safety and Manufacturability
| Prototype Area | Material or Option | Useful Specification | Safety Checks | Manufacturability Notes |
|---|---|---|---|---|
| Main body fabric | Short-pile polyester plush | Approximately 1–3 mm pile; choose a stable backing and a soft hand feel. | Check for loose fibres, colour transfer, and seam strength after washing or abrasion testing appropriate to the product. | Short pile is generally easier to cut, mark, and sew than long pile. Keep pile direction consistent across pattern pieces. |
| Alternative body fabric | Cotton woven fabric | A tightly woven, pre-shrunk fabric can provide a smooth surface for printed details. | Confirm dyes and finishes are suitable for the intended market and use; assess shrinkage and colourfastness. | Easy to sew and suitable for small details, but may fray. Include seam allowance and test after laundering if washability is required. |
| Contrast details | Felt or appliqué fabric | Use details sized and shaped to suit the toy pattern; prototype with the intended fabric thickness. | Secure all edges with stitching or another validated method. Avoid small detachable pieces on toys intended for young children. | Appliqué can replace separately attached pieces and simplify assembly. Check that multiple layers do not create bulky seams. |
| Primary filling | Clean polyester fibre filling | Select a resilient filling that can be distributed evenly through the toy’s body and limbs. | Prevent filling from escaping through seams or fabric. Assess the finished toy for clumping and exposed fibres after handling and relevant testing. | Widely used for soft toys and easy to add by hand or with filling equipment. Provide an adequately sized opening for stuffing and closing. |
| Shape support | Additional fibre filling in small, controlled amounts | Use denser packing only where needed, such as the body or base, to help the prototype hold its intended shape. | Check that firm areas do not create hard points or make the toy unsuitable for its intended age group. | Document filling amounts and locations so samples can be reproduced consistently. Avoid overfilling, which can strain seams. |
| Eyes and facial features | Embroidered facial features | Use embroidery thread and stitch density suited to the face fabric and design scale. | Embroidered features avoid hard, detachable eye components. Inspect for loose threads, exposed knots, and gaps after use testing. | Works well for small faces and can be applied before the toy is assembled. Confirm placement with a sewn prototype, not artwork alone. |
| Fasteners and closures | Hidden hand-sewn or machine-sewn closure | Plan the opening on a low-visibility seam and allow enough access for filling and inspection. | Close the opening securely and check seam integrity. Avoid exposed zippers, snaps, or other small detachable hardware where inappropriate. | A ladder stitch can give a neat hand-finished seam; a machine closure is faster when the design permits a concealed seam allowance. |
| Decorative trims | Ribbon, cord, or narrow fabric strips | Use only where they support the design; prototype trim width, attachment points, and finished ends. | Assess loops, long ends, and pull-out risk for the intended age group. Secure trim ends and avoid hazardous entanglement features. | Attach trim into a seam where practical. This can reduce extra operations and improve resistance to pulling. |
| Labels and identification | Soft woven or printed fabric label | Keep the label size and placement proportionate to the toy; use a finished edge or folded construction. | Check edges for scratchiness and attachment for pull-out. Confirm required product information for the destination market separately. | A label caught into an existing seam can reduce assembly steps. Verify placement on the prototype before production. |
| Prototype validation | Sewn sample using intended production materials | Record fabric, thread, filling, trim, pattern revision, and assembly sequence for each sample. | Evaluate the finished toy against applicable toy-safety requirements in each sales market. Use qualified testing where required; a prototype review alone is not certification. | Check cutting yield, seam access, stuffing time, closure quality, and repeatability before approving the construction for a production trial. |
Material choices and safety requirements depend on the toy’s design, intended age group, and destination market. Validate the final construction using the applicable standards and testing procedures.
Build and Evaluate a Sample Against ASTM F963 and EN 71 Requirements
How to Develop a Custom Soft Toy Prototype?
A soft toy prototype should be evaluated as a safety product, not just a visual sample. Start with the intended age group, materials, stitching, filling, and attached features. Record every component in a technical file. Small details matter. A loose thread or weak seam can become a serious hazard during testing.
Build several samples using production-like fabric, thread, stuffing, and accessories. Check seam strength, pull resistance, small parts, sharp points, and accessible filling. Review flammability requirements under ASTM F963 and the relevant EN 71 sections. Chemical testing may also be needed for dyes, coatings, plastic parts, and other accessible materials. Requirements can differ by market and toy design. Do not assume one successful test covers every version.
Send representative samples to a qualified testing laboratory before mass production. Compare the report with the prototype record, warning information, and age grading. In practice, the first sample may fail. That is useful evidence, not a disaster. One prototype might show opened stitching after repeated pulls, while another may reveal excessive dye transfer. Correct the construction, then retest the changed parts. Keep test reports, material declarations, revisions, and supplier records together. This process supports more reliable decisions against ASTM F963 and EN 71 requirements.
Refine the Prototype and Verify CPSIA Limits: 100 ppm Lead, 0.1% Phthalates
A custom soft toy prototype should be refined for comfort, durability, and material safety. Check seams, embroidery, and small attached parts after repeated pulling and washing. A loose thread may seem minor, but it can reveal a weak construction point. Keep a record of fabric, filling, thread, and trim suppliers so each material can be traced during review.
CPSIA testing deserves attention before production. The general lead limit is 100 ppm in accessible component parts. For applicable regulated phthalates, the limit is 0.1% in each covered plasticized component. These limits do not mean every material is tested in the same way. Ask a qualified laboratory to assess the actual materials and components in a production-representative sample. Supplier paperwork helps, but it does not replace appropriate testing. If you change a print, coating, or plastic trim, review whether the test results still apply.
Tips: Label each prototype with its material details and revision date. Keep one sample unchanged for comparison. A small mismatch can slip through; that is worth checking twice. My own review would include another close look at hidden seams before approving the next sample.
FAQS
Choose tightly woven polyester, cotton, or certified recycled fibers.
Loose fibers may shed into a child’s mouth.
Use clean, evenly sized polyester fiberfill with documented composition.
Reinforce seams near ears, limbs, and embroidered features.
Use attachment methods that remain secure during pulling and washing.
Test seam strength, pull resistance, small parts, sharp points, and accessible filling.
Build several samples with production-like fabric, thread, filling, and accessories.
Keep material certificates, test reports, revisions, supplier records, and age-grading information together.
Treat the failure as useful evidence, not a disaster.
Conclusion
Custom Soft Toy Prototype Development begins with a clear brief that defines the intended user age, toy dimensions, key features, and available prototype budget. These decisions guide the design process and help ensure the sample is practical to produce. Sketches are then translated into workable pattern pieces, with suitable seam allowances and detailed material specifications so the design can be assembled consistently.
Fabric, filling, and trims should be selected for their feel, durability, safety, and ease of manufacture. After construction, evaluate the sample for stitching, small components, and age-appropriate hazards, using relevant ASTM F963 and EN 71 requirements as benchmarks. Refine the pattern and materials based on the evaluation, then verify that applicable CPSIA limits are met, including 100 ppm for lead and 0.1% for specified phthalates. This structured process turns an initial concept into a more reliable, safe, and production-ready prototype.
Blog Tags:
Instant Query